Pixel LED 3 Digit Seven Segment token number Display board
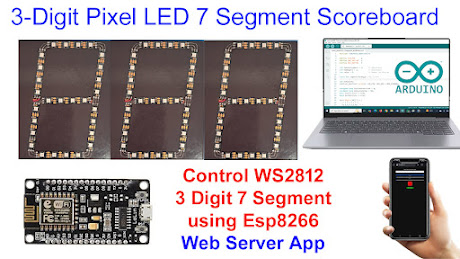
DIY WiFi Scoreboard with Pixel LED Segments & NodeMCU | Mobile App Interface by Manmohan Pal In this video, Manmohan Pal demonstrates how to build a WiFi-enabled 3-digit scoreboard using Pixel LED-based seven-segment displays and a NodeMCU (ESP8266) microcontroller. The scoreboard is fully controlled via a custom mobile app interface, allowing real-time updates wirelessly! 💡 Features: 3-digit scoreboard using Pixel LED segments Wireless control via WiFi using NodeMCU Custom mobile app interface for score updates Compact and scalable design for sports or game applications Easy-to-follow DIY tutorial 📱 Control Interface: A simple and intuitive mobile app is used to send score data over WiFi to the NodeMCU, which drives the Pixel LED segments accordingly. Great for small sports events, quizzes, or custom display projects. 🔧 Components Used: NodeMCU ESP8266 WS2812B Pixel LEDs (for custom 7-segment display) Power supply (5V) Mobile App (created using [mention if using Blynk, MIT App Inventor, etc.]) Wires, connectors, and baseplate for assembly 🛠️ What You'll Learn: How to create a seven-segment display using Pixel LEDs Interfacing WS2812B LEDs with NodeMCU Sending data wirelessly using WiFi Building and connecting a mobile app for real-time control 📌 Whether you're a beginner or hobbyist, this project combines IoT, electronics, and creative display design in a practical and fun way! 🔔 Don't forget to Like, Share & Subscribe for more DIY electronics and IoT tutorials from Manmohan Pal! 📎 Project Code & Circuit Diagram: [Add Google Drive or GitHub link if available] 📲 Mobile App Source: [Add link or QR code if available] Blog: https://arduinobymanmohan.blogspot.com/p/pixel-led-3-digit-seven-segment-token.html
WiFi scoreboard, DIY scoreboard, Pixel LED scoreboard, NodeMCU scoreboard, 3 digit scoreboard, ESP8266 project, NodeMCU project, WiFi display, 7 segment display, WS2812B LED, mobile controlled scoreboard, IoT scoreboard, LED scoreboard DIY, smart scoreboard, custom scoreboard, NodeMCU LED project, DIY electronics, scoreboard using NodeMCU, wireless scoreboard, Manmohan Pal
#WiFiScoreboard #NodeMCU #PixelLED #ESP8266 #DIYElectronics #ManmohanPal #IoTProjects #7SegmentDisplay

This code is for a 3-digit 7-segment display made using WS2812 (NeoPixel) LEDs, controlled by a NodeMCU ESP8266. It creates a Wi-Fi hotspot and a web page
that lets the user input a number (0–999) and change the color of the digits using RGB sliders. The selected number is
then shown on the LED display.
🔧 Libraries
#include <ESP8266WiFi.h> // For Wi-Fi functionality
#include <ESP8266WebServer.h> // For serving a web page
#include <Adafruit_NeoPixel.h> // For controlling WS2812 LEDs
🔩 Configuration
#define LED_PIN D6 // Data pin connected to WS2812 LEDs
#define NUM_DIGITS 3 // 3-digit display
#define LEDS_PER_SEGMENT 4 // Each segment has 4 LEDs
#define SEGMENTS_PER_DIGIT 7 // 7 segments in a digit
#define TOTAL_LEDS (NUM_DIGITS * SEGMENTS_PER_DIGIT * LEDS_PER_SEGMENT)
💡 NeoPixel Setup
Adafruit_NeoPixel strip(TOTAL_LEDS, LED_PIN, NEO_GRB + NEO_KHZ800);
Initializes the total number of LEDs and the data format.
🔠 Digit to Segment Mapping
const byte digitMap[10][7] = { ... }
Each row represents a digit (0–9). Each column (7 total) represents a
segment: F, A, B, C, D, E, G. A value of 1 means the segment is ON for that digit.
🌐 Web Server & Variables
ESP8266WebServer server(80);
int displayNumber = 0;
uint32_t currentColor = strip.Color(255, 0, 0); // Default red
🛠️ setup() Function
Start Serial and NeoPixel
Start Wi-Fi in Access Point Mode
WiFi.softAP("TokenDisplay", "12345678");
Starts a Wi-Fi hotspot named TokenDisplay with password 12345678.
Setup Web Routes
server.on("/", handleForm); // Display HTML form
server.on("/submit", handleSubmit); // Handle form submission
🔁 loop() Function
Handles incoming web clients.
Updates display only if:
Number or color has changed.
if (displayNumber != previousNumber || currentColor != previousColor)
🌐 handleForm() – HTML Page
Displays:
Input box for token number
RGB sliders
Live color preview (<div id="colorPreview">)
JavaScript updates the preview color in real time.
📥 handleSubmit() – Form Submission Handler
Reads the form inputs:
number, r, g, b
Converts them to an integer and color
Updates displayNumber and currentColor
Redirects back to the form (server.sendHeader("Location", "/", true))
🔢 showNumber(int num)
Converts number to individual digits (e.g., 456 → [4, 5, 6])
For each digit:
Uses digitMap to light up the correct segments
For each segment:
Lights all LEDs in that segment with currentColor
Displays it using strip.show()
📊 LED Addressing Logic
Each LED is addressed as:
int startLED = (digitIndex * SEGMENTS_PER_DIGIT + segmentIndex) * LEDS_PER_SEGMENT;
This ensures LEDs for all segments and digits are lit properly.
✅ Summary
Feature Description
Wi-Fi Hotspot NodeMCU acts as access point
Web Interface Allows number and color input
3-Digit Display Shows values from 000 to 999
NeoPixel Control Colors and brightness managed with Adafruit_NeoPixel
Live Color Preview JavaScript updates preview as sliders move
//////////////////////////// Complete Code////////////////////
#include <ESP8266WiFi.h>
#include <ESP8266WebServer.h>
#include <Adafruit_NeoPixel.h>
// === CONFIGURATION ===
#define LED_PIN D6
#define NUM_DIGITS 3
#define LEDS_PER_SEGMENT 4
#define SEGMENTS_PER_DIGIT 7
#define TOTAL_LEDS (NUM_DIGITS * SEGMENTS_PER_DIGIT * LEDS_PER_SEGMENT)
// NeoPixel setup
Adafruit_NeoPixel strip(TOTAL_LEDS, LED_PIN, NEO_GRB + NEO_KHZ800);
// Segment layout: F, A, B, C, D, E, G
const byte digitMap[10][7] = {
{1, 1, 1, 1, 1, 1, 0},
{0, 0, 1, 1, 0, 0, 0},
{0, 1, 1, 0, 1, 1, 1},
{0, 1, 1, 1, 1, 0, 1},
{1, 0, 1, 1, 0, 0, 1},
{1, 1, 0, 1, 1, 0, 1},
{1, 1, 0, 1, 1, 1, 1},
{0, 1, 1, 1, 0, 0, 0},
{1, 1, 1, 1, 1, 1, 1},
{1, 1, 1, 1, 1, 0, 1}
};
// Web server
ESP8266WebServer server(80);
// Values
int displayNumber = 0;
int previousNumber = -1;
uint32_t currentColor = strip.Color(255, 0, 0);
uint32_t previousColor = 0;
void setup() {
Serial.begin(115200);
delay(100);
Serial.print("Reset reason: ");
Serial.println(ESP.getResetReason());
strip.begin();
strip.clear();
strip.show();
WiFi.softAP("TokenDisplay", "12345678");
Serial.println("WiFi Access Point started");
Serial.print("IP address: ");
Serial.println(WiFi.softAPIP());
server.on("/", handleForm);
server.on("/submit", handleSubmit);
server.begin();
Serial.println("Web server started");
}
void loop() {
server.handleClient();
if (displayNumber != previousNumber || currentColor != previousColor) {
showNumber(displayNumber);
previousNumber = displayNumber;
previousColor = currentColor;
}
}
void handleForm() {
String html = R"rawliteral(
<!DOCTYPE html>
<html>
<head>
<title>Token Display</title>
<style>
body { background: #111; color: #fff; font-family: Arial; text-align: center; padding: 20px; }
input[type=number], input[type=range] { padding: 10px; margin: 10px; width: 80%; font-size: 18px; }
button { padding: 10px 30px; font-size: 20px; margin-top: 20px; background: green; color: white; border: none; }
#colorPreview { width: 100px; height: 100px; margin: 20px auto; border: 2px solid #fff; }
</style>
</head>
<body>
<h2>Enter Token and Choose Color</h2>
<form action="/submit" method="GET">
<input type="number" name="number" min="0" max="999" placeholder="Token Number" required><br>
<label>Red: <span id="rVal">255</span></label><br>
<input type="range" name="r" min="0" max="255" value="255" oninput="updateColor()" id="rSlider"><br>
<label>Green: <span id="gVal">0</span></label><br>
<input type="range" name="g" min="0" max="255" value="0" oninput="updateColor()" id="gSlider"><br>
<label>Blue: <span id="bVal">0</span></label><br>
<input type="range" name="b" min="0" max="255" value="0" oninput="updateColor()" id="bSlider"><br>
<div id="colorPreview"></div>
<button type="submit">Update Display</button>
</form>
<script>
function updateColor() {
let r = document.getElementById('rSlider').value;
let g = document.getElementById('gSlider').value;
let b = document.getElementById('bSlider').value;
document.getElementById('rVal').innerText = r;
document.getElementById('gVal').innerText = g;
document.getElementById('bVal').innerText = b;
document.getElementById('colorPreview').style.backgroundColor = `rgb(${r},${g},${b})`;
}
updateColor(); // initialize
</script>
</body>
</html>
)rawliteral";
server.send(200, "text/html", html);
}
void handleSubmit() {
if (server.hasArg("number")) {
displayNumber = server.arg("number").toInt();
Serial.print("Received number: ");
Serial.println(displayNumber);
}
if (server.hasArg("r") && server.hasArg("g") && server.hasArg("b")) {
int r = server.arg("r").toInt();
int g = server.arg("g").toInt();
int b = server.arg("b").toInt();
currentColor = strip.Color(r, g, b);
Serial.printf("Received color: R=%d G=%d B=%d\n", r, g, b);
}
server.sendHeader("Location", "/", true);
server.send(302, "text/plain", "");
}
void showNumber(int num) {
strip.clear();
int digits[NUM_DIGITS] = {0};
for (int i = NUM_DIGITS - 1; i >= 0; i--) {
digits[i] = num % 10;
num /= 10;
}
for (int d = 0; d < NUM_DIGITS; d++) {
for (int s = 0; s < SEGMENTS_PER_DIGIT; s++) {
if (digitMap[digits[d]][s]) {
int startLED = (d * SEGMENTS_PER_DIGIT + s) * LEDS_PER_SEGMENT;
for (int l = 0; l < LEDS_PER_SEGMENT; l++) {
strip.setPixelColor(startLED + l, currentColor);
}
}
}
}
strip.show();
}
//////////////////////////////////////////////////////////////
No comments:
Post a Comment